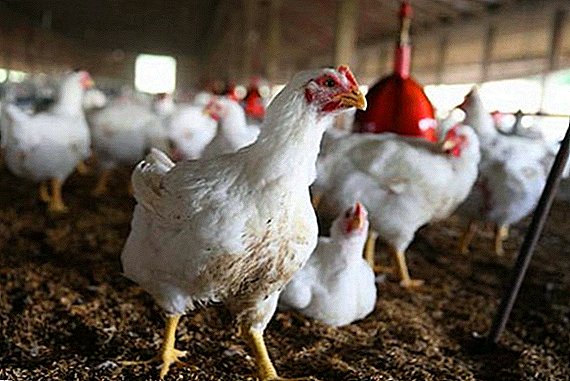
Almost every villa owner thinks that it is necessary to start some living creatures in order to always get fresh products not only from the garden. Often, such animals are ordinary chickens, which can produce fresh and healthy eggs, and later - dietary meat. The maintenance of such a bird does not require much effort and the construction of bulky structures.
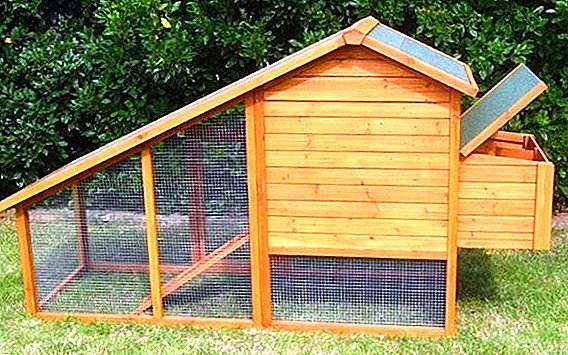
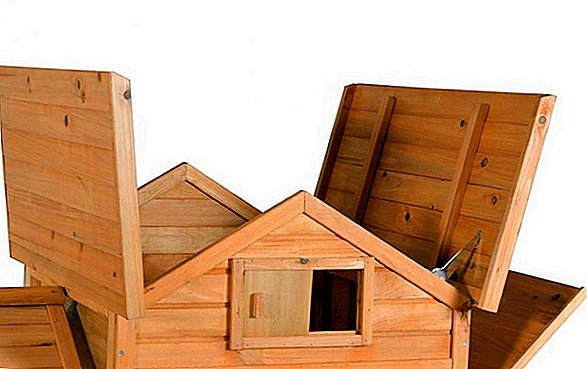
Design features of a small portable chicken coop
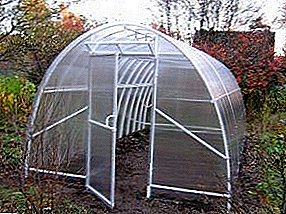
For the maintenance of 5-10 birds, you can build a small chicken coop, which will not occupy much free space on the territory of the cottage. The design of such a structure should be well thought out, since the productivity of chickens depends on the conditions of detention.
Important! Portable chicken coops can not be built from scrap materials, because their reliability is very doubtful.It is also very important to choose the location of the future structure correctly - it should be dry and light. It should be understood that the design should be lightweight, so that it can be moved around the territory without any problems.

Pros and cons of mobile designs
Mini-chicken coops have their own advantages and disadvantages.
The advantages of portable structures include:
- the ability to change the location. Transportation of the chicken coop from one place to another allows you to protect birds from disease;
- custom design. Mini chicken coops can be fitted with wheels that not only make it easy to move chicken coops, but also give them an original look;
- easy cleaning of the hen house. The cleaning procedure becomes even easier if the chicken coop is moved closer to the water source;
- low cost. The cost of construction is significantly reduced if you build a chicken coop with your own hands right at the dacha;
- constant supply of birds with fresh insects. Portable chicken coops are well blown, which means that various insects that are a source of protein can easily get into them.
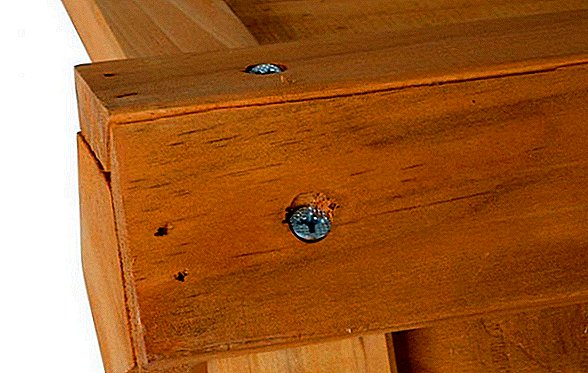
Important! To increase strength, all elements should be joined with bolts, not nails. So in the future it will be easy to carry out repairs.There are not as many disadvantages as advantages, but they still exist:
- similar constructions limit the number of birds that can fit there;
- upon completion of construction there is no possibility to make any extension;
- if the project was miscalculated, then the movement could damage or even break the entire chicken coop.

Drawing up project and calculation of the sizes
Drawing up a project and creating all the drawings will help to build a reliable and durable structure. Also, creating a project will allow you to calculate the budget in advance.
Read more about how to build a chicken coop for 20, 30 and 50 chickens.
Before starting the design it is important to understand that the rooms for 10 and 20 chickens differ from each other exclusively in size. Experts say that to accommodate 10 chickens enough chicken coop size of 2 to 2 meters.
In general, the project should directly depend on the size of the area on which the house is planned to be located. When designing, it is important to take into account the materials from which the future building will be constructed. 
Materials and tools
Once the project is ready, you need to start purchasing materials and tools.
A sample list of materials for the construction of a portable chicken coop looks like this:
- wooden slats;
- timber;
- Rabitz;
- plywood sheet;
- metal fittings or pipe;
- slate or roof tiles;
- foam, wool or other insulation;
- screws, nails, rivets;
- hinges for doors.
 The above materials will be quite enough to build a reliable design.
The list of tools is much smaller and looks like this:
- hammer;
- screwdriver or screwdriver (cross-shaped and flat);
- saw;
- drill.
Step by Step instructions
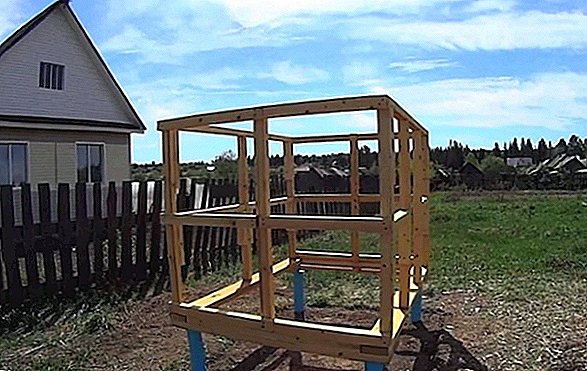
- The first to prepare the elements of wood, respecting all the dimensions planned by the project, since these elements will create a solid frame. Immediately it is necessary to determine where the entrance and windows will be located.
- In the next step, the frame is assembled. The main fixing element is screws. To increase reliability and durability it is possible to make connecting grooves in wooden elements.
- Next, you should make a door through which the birds will get inside the room, it is often done in the left part of the chicken coop. It is also worth taking care of a large entrance that will be used by a person to perform cleaning and disinfection procedures.
- At this stage, the inside of the structure should be sheathed with plywood. It is fastened with screws.
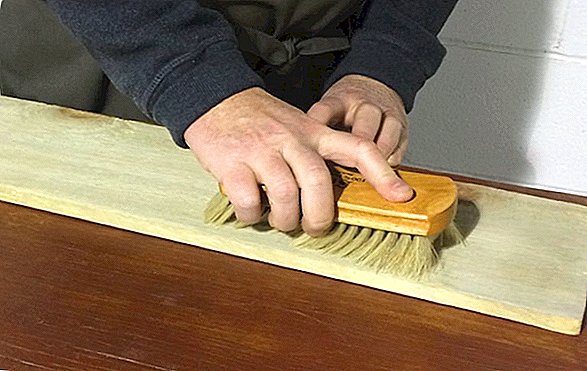
- Next, you need to put the material on the walls for insulation, and then - sheathe the walls from the outside. To protect the plywood from external factors, it should be painted and allowed to dry well.
- Making legs. Their length should be about 50 centimeters, and they should be placed around the perimeter at a distance of half a meter from each other.
- For the construction of the roof should be installed transverse slats, after - to fix the insulating material, and then - from the inside upholstered roof with plywood.
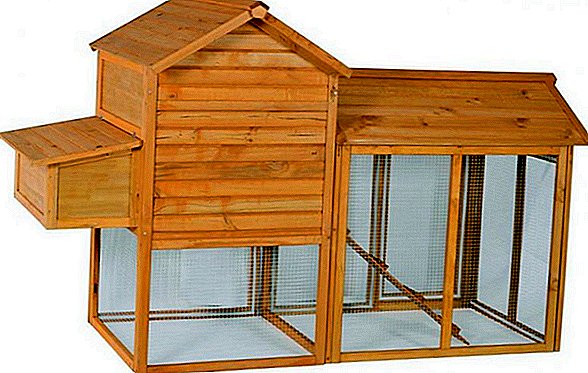
- After the main part is completed, it is necessary to proceed to the construction of walking, which is best placed under the chicken coop. Its size should be 2 times larger than the house itself for birds. The design of the walking range consists of rods, driven into the ground, and the grid, which is stretched on them.


Arrangement of the house
During the construction of the house, its internal arrangement is even more important than the external one.
Did you know? Chickens lay eggs only in the light. Even if the time to rush already approached, the chicken still waits until the day comes or the lights come on.
Perches
Perches should be located at a height of 80 centimeters, and they should be made of wooden slats. The step between the perches should be about half a meter.
There are perches of the following types:
- perches, which are often located along the wall;
- bars that are placed around the perimeter of the room and on the same level. In some embodiments, the bars are located at different levels;
- hygienic type roost. This design is mobile and looks like a table with earpieces.

Nest
To increase the egg production of chickens, it is necessary to build high-quality nests. There are many options for nests, so you should choose the one that is suitable for a particular design. Some craftsmen allow the use of old boxes and baskets as bases.
The best option would be to build nests from new materials, adding additional collections for eggs. It is important to know that for 5-10 chickens a minimum of 2-4 nests is necessary (3-4 individuals per one).
Feeders and drinkers
It is necessary to have feeding troughs and drinking bowls in the center of the hen house. This will ensure constant and equal access to water and food for all chickens. It is also recommended to provide a small trough with ashes so that the birds can swim in it. You can install an additional feeder, which put vitamin supplements.
It will be useful for you to read about how to independently make roosts, nests, drinking bowls and feeding troughs (automatic and bunker) for chickens.
Litter
A good option for bedding is sawdust or peat, sometimes using their mixture. Also moss shows itself well. The litter should be at least 15 cm thick. Once a week, the contaminated top layer should be removed and replaced with a new one. 
What else to take care
Mini-chicken coop - the design is simple and small, so it does not require any specific devices or devices.
Lighting
Care should also be taken to ensure proper lighting in the hen house. To do this, you can install windows that can both increase the amount of light in the room and protect the birds from the summer heat. Some windows are equipped with special shutters that can simplify the procedure for regulating the saturation of light.
We advise you to read about how to make ventilation in the chicken house, and also find out what kind of lighting should be in the chicken house in winter.
Ventilation
Ventilation in the chicken coop can be done in several ways:
- through doors / windows;
- through the supply and exhaust system;
- using ventilation systems.

The last option in the case under discussion is not suitable, since it is very costly with a small herd and requires connection to communications. The first method is the most logical and does not require additional costs, but it is not always possible to provide ventilation without drafts, which birds do not like (especially in the cold season).
Did you know? In Zoroastrianism, chickens were considered sacred birds, since the roosters with their singing marked the rising of the sun, informing the world about the arrival of light.
For the supply and exhaust system, 2 pipes are needed that are inserted into the roof from different sides of the chicken house: the supply pipe with one end should be approximately 30 cm above the floor of the house, and the other above the roof at about the same distance; exhaust pipe, on the contrary, one end is centimeters 25 from the ceiling, and the rest (a meter or more in length) is placed above the roof.
Winter insulation
The main material for the insulation of such structures is foil penofol, it retains heat well inside the room. Sometimes mineral wool and polystyrene are used for insulation, as these materials are available.  You should also warm the floor, because it is from him comes a large amount of cold. An increase in the thickness of the litter up to 25 cm and higher will help here. The roof and ceiling are also insulated. Often, the same materials are used for the roof as for the walls, so it is possible to save money.
Did you know? In ancient Egypt, it was believed that if a chicken with an appetite bites grain at sunset, it promises good luck in future endeavors.If you take only the first steps in the breeding, then a small flock and a mini-chicken coop - this is what you need.