Not all poultry farmers were faced with such a concept as a brooder, especially if the young are bought already grown up, without using an incubator. In fact, it is a great assistant farmer who can provide ducklings, chickens, poults or any other chicks with all the necessary conditions in the first weeks of life. Let's find out what brooder is and how it should be for the content of turkey poults.
What is a brooder
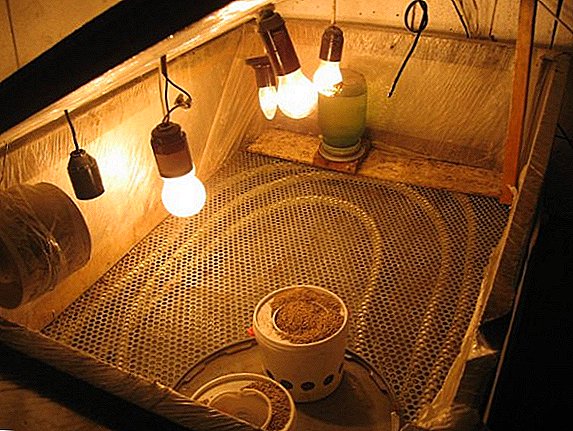
By and large, we are talking about a box in which the most appropriate conditions are created for the full growth and development of chicks immediately after birth. The inner space of such a box is complemented by heating and lighting elements, automatic feeders and drinkers, thanks to which the owner of the poults can only control the process of their growth and development, putting a minimum of physical effort.  Of course, the purchase of such an ideal place for keeping birds is expensive, but if you want, you can make it yourself, given the increased demands on the poults for the growing conditions. The dimensions of the product, the material of manufacture and the internal "stuffing" are selected in accordance with the number of chicks, but in any case it is important to adhere to several general rules when making homemade brooders.
Did you know? It is believed that during the first few weeks of life, the poults should rest for at least 16 hours a day, because only in this way it is possible to ensure their full growth and development. At least, it is precisely to such an opinion that scientists from the Cooperative Service for the Promotion of Agricultural Knowledge and the Implementation of US Achievements at the University of Arkansas arrived.
Basic requirements for the box for turkey poults
There are no fixed requirements for a turkey brood, but to create the most comfortable conditions for the birds, the following nuances should be taken into account:
- 100 turkey poults should be at least 1 square. m square box, that is, in a box size of 40x40 cm can accommodate about 25 chicks.
- The form and number of tiers of the brooder are not fundamental: they can be either multi-tiered structures or small, separately placed boxes made of sheet materials or galvanized with a fine-meshed mesh.
- With constant maintenance of chicks in the brooder, it is desirable that its floor be made of a grid that will not trap excrement inside the box (in multi-tiered structures, retractable trays are additionally installed on the roof of the lower floor, which greatly simplifies the task of cleaning).
- It is desirable that feathery cells rise above the floor by no less than 30-50 cm, especially if there is a concrete, cold coating indoors.
- On one side of the box are attached feeders and drinkers.
- Inside the finished structure, you need to constantly maintain sufficient lighting and optimum temperature (for this purpose, infrared or reflector lamps are usually used, and heaters are installed around the perimeter of the box).

Important! In the first week of the life of the poults, the temperature inside the brooder is kept within +30 ° C, and later this value can be lowered to + 20 ... +25 ° C.
Making a brooch for turkey poults with your own hands
Having carefully studied all the requirements for poultry poultry brokers, you can prepare the material and begin to create a temporary residence for chicks. Let's find out what is needed to accomplish this task and in what sequence to do the work.
Video: drawings
Necessary materials
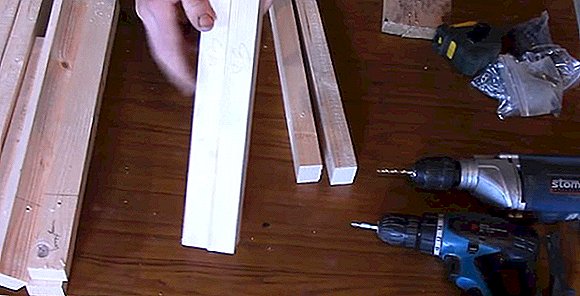
Suppose that you do not have a lot of bird, and you decided to build a frame structure with a height of 35 cm, a depth of 50 cm and a width of 100 cm, with a lining of hardboard. For this you need to prepare the following materials:
- timber (30x40) - 4 pieces, 3 m long (further they are cut into 100 cm - 4 pcs., 45 cm - 4 pcs., 42 cm - 2 pcs., 32 cm - 1 pcs., 48 cm - 1 pc. ., 47 cm - 2 pcs., 23 cm - 2 pcs., And the remaining parts are used to make a tray for litter);
- boards 100x25, 42 cm - 2 pcs .;
- 8 mm thick fiberboard sheet (width - 50 cm, length - 105 cm) - 4 pcs .;
- galvanized fine mesh mesh size 105x46 cm;
- grid for poultry houses with cells 10x10 mm;
- a cell from an old refrigerator or another similar container;
- a small piece of linoleum;
- wood screws (length - 70 mm) - a standard sachet will suffice;
- small black screws for fastening the hinges;
- self-tapping screws with press washer for 13 and 20 mm - 20 pieces each.
Find out more about brooder.
From the working tool it is worth preparing:
- electric drill (with a drill on 4);
- screwdriver;
- a hacksaw;
- roulette wheel;
- pencil.
Did you know? Turkeys feel great changes in weather conditions, so if the birds begin to pluck themselves and straighten the feathers, it means that changes are outlined in the coming days, and hardly in a good way.
Step-by-step instruction
Having spread out all the necessary materials in front of you, you can proceed to the direct collection of the structure. 
One of the possible options for creating a brooder for turkey poults looks like this:
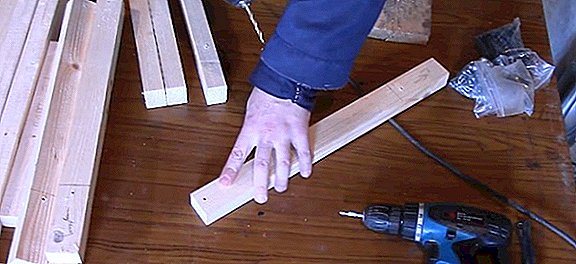
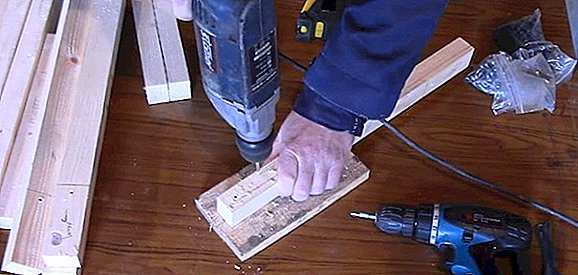
- We cut the purchased bars into the required number of segments (the exact dimensions are indicated above) and, for convenience, sign the size of each of them with a pencil.
- We take two 45-centimeter bars (they will serve as brooder's legs) and measure with a tape measure from the end of 3.5 cm - this will be the floor level.
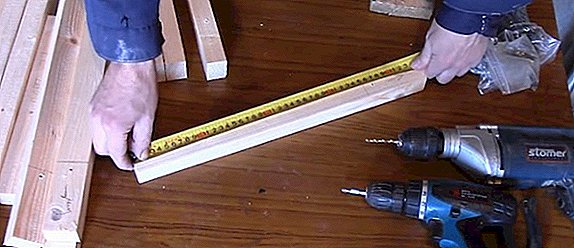
- On both sides of these bars (placed wide part up), departing 1.5 cm from the edge and from the mark (downward), we make two holes with a drill.
- Turning the bar up (now the narrow part should look up), we drill three more holes (two from the side of the upper part and one in the area of the leg mark), but only so that they do not overlap with the existing ones.
- We perform the indicated actions with two other such bars (there should be 4 legs in total).
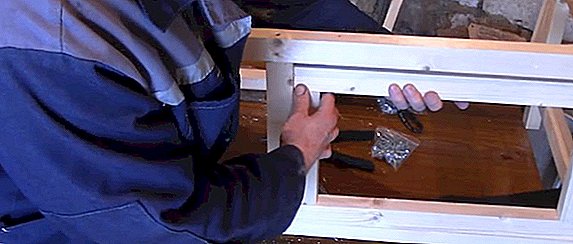
- We join the legs with long bars 100 cm with screws. The result should be two frames of two short and two long parts each (frame).
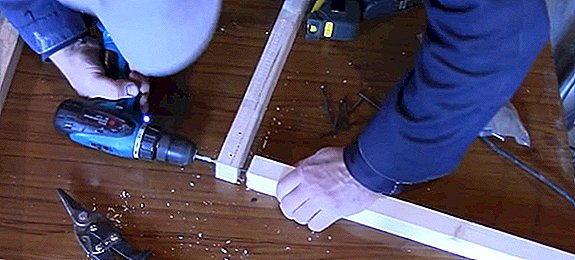
- We take one of these frames and fasten a board (in the upper part of the bar) through the two holes already drilled.
- A similar action is performed on the other side.
- Having securely fixed the boards, we fasten the lower bars (1.5 cm above the main horizontal bar), which will later serve as the basis for fixing the hardboard. As a result, they will be located parallel to the already bolted boards, and if you turn the design, it will resemble a long chair without a cover.
- We take our second "frame" and attach it to the protruding bars of the assembled product, so that we get a finished frame on four legs.
- We put it on the table and proceed to the creation of the front door and bunker feeders. From the front of the structure, exactly in the middle, we attach a 42 cm long bar, and to the left of it we mount another horizontally (it rests on a part of a long base), which will serve as a support for the feeder. Both vertical and horizontal bars should be placed wide side to the facade.
- On the other hand, from two bars of 42 cm and two bars of 23 cm, we create a door, simply fastening them together with self-tapping screws (a rectangle should turn out, which will later be hung on the hinges).
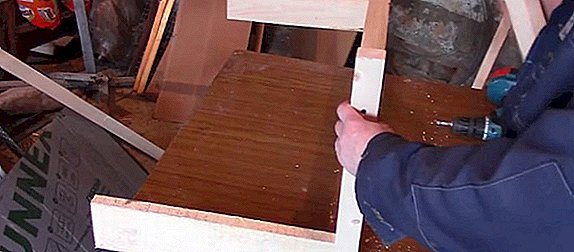
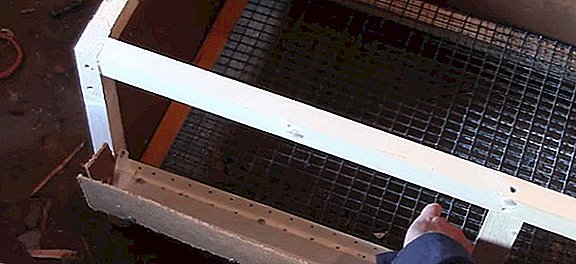
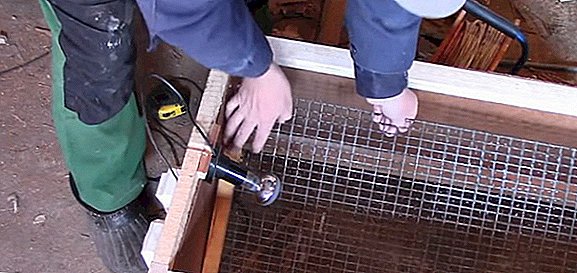
- We plant the door base on the hinges and proceed to the bottom lining with mesh.
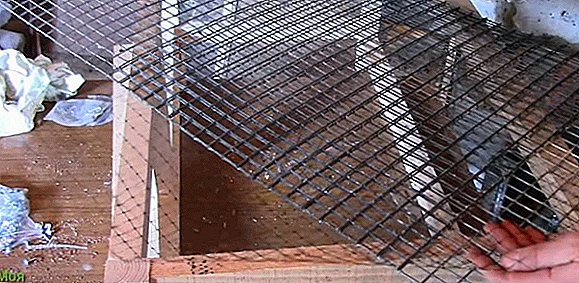
- With the help of narrow planochek and small self-tapping screws, we fasten two grids on both sides (galvanized and softer). It turned out the finished flooring, which is installed through the top of the structure on the bars located at the bottom, but is not screwed with self-tapping screws (it’s good if you can pull out the floor at any time).
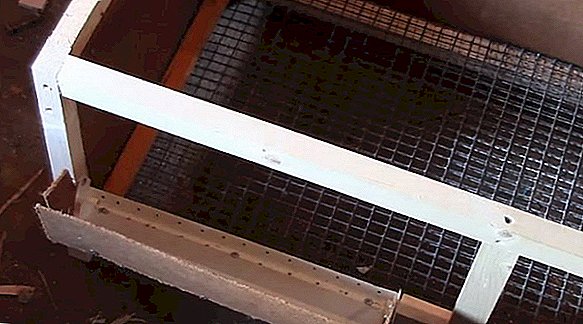
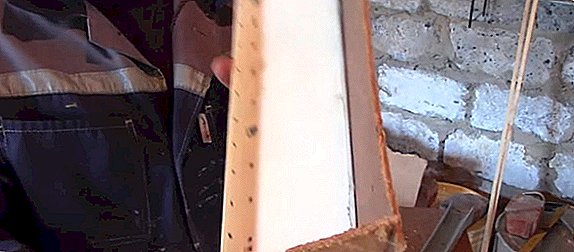
- Install the side and back panel of fiberboard, fixing all these elements with screws to the brooder frame bars.
Read also about how to properly grow turkeys in an incubator and what should be the temperature regime for turkeys.
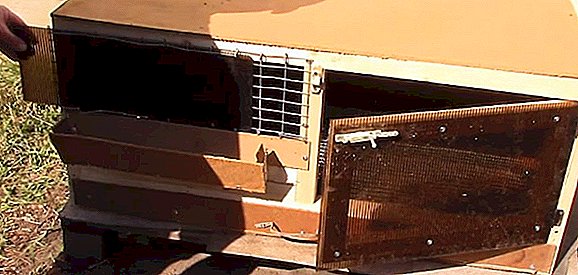
- We proceed to the creation of the feeder. Cut the back of the cell wall from the refrigerator, leaving only 1 cm for fixing a piece of fiberboard, and fasten the latter with screws (press washers) from three sides so that this part is much higher than the rest and is located under the slope. The gaps on both sides are covered with two more pieces of fiberboard, also fastening them with self-tapping screws.
- The finished trough is attached to an additional horizontal bar located next to the brooder door, but only so that the side of the fiberboard is on the outside.
- Cut a feed restrictor out of a sheet of fiberboard and cut through the grooves in it at the points of contact with the vertical walls of the feeder.
- From the inside we insert a piece of coarse mesh into the feeder, with a cell width of 2-2.5 cm (on the sides the net is fastened with screws with press washers).
- Now, when the trough is attached, you can move on to the door sewing by a 330x490 cm polycarbonate sheet. We fasten it with screws with press washers to 13, closely leaning against the hinges of the door (six fixing points will be enough: three at the top and three at the bottom).
- In the upper part of the door we fasten the bolt to the bar, fixing it with small self-tapping screws. Next to the latch, we install an eyelet, having previously placed a fiberboard of the same size as polycarbonate under it.

- We lay the free space above the trough with a large galvanized net and fasten polycarbonate to it, but only so that it freely comes in and drives out (you can bend the net on both sides to get the slots). If this is not done, turkey poults will be free to climb out of the brooder.
- We install a switch on the side wall of the brooder and carry out lighting inside, securing the cartridge under the lamp in the upper part of the side panel.
- Now we will make a tray under the litter. All you need to do is to create another frame to the size of the brooder bottom and attach to it a sheet of linoleum and fiberboard corresponding in size (small self-tapping screws are used). From the front side, we attach another long piece of fiberboard to the beam of the tray, the length of which will be longer than the bar itself (must be free to go on the legs of the structure). This part will serve as a kind of limiter and will not allow the pallet to go far under the brooder. If desired, you can attach a handle to its middle for greater ease of removal.
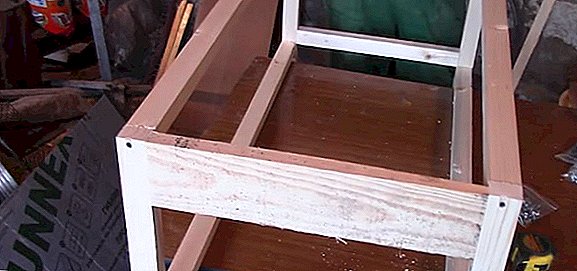
- "Sewing" the upper part of the frame with a sheet of hardboard (screwed with screws to the bars) and get the roof - the final element of our brooder.


Video: do it yourself broder
This design is equally well suited for both poults and chickens, the main thing is to correctly calculate the number of chicks per available area.
Important! Always monitor the temperature inside the structure, and if the chicks are very hot from a light bulb, then it is worth considering the possibility of using a lighting element of lesser power.
Content of turkey poults in brooder
Bruder - temporary residence of turkey poults, where they are only two weeks after birth, and then they are resettled in a permanent corral, aviary or cage. Small chicks are very sensitive to any changes in temperature and humidity, therefore, when keeping them in a brooder, it is important to maintain appropriate temperature conditions:
- From the 1st to the 6th day - + 33 ... +35 ° C;
- from the 6th to the 10th day - about +30 ° C;
- From the 11th to the 30th day - up to +20 ° C.
 If necessary, you can add several feeders to the inside of the box, but most importantly, they should be long, narrow and eliminate the possible crush of chicks. This rule applies to drinkers: wetting is unacceptable, so all inhabitants should drink water in doses without pouring it.
As we see, brooder for turkey poults is a very convenient and useful design, with the use of which it is possible to significantly facilitate the task of keeping young stock. We told only about one of the possible ways of self-construction of the "box", but depending on the materials available, you can modify the design at your discretion, the main thing is to adhere to general requirements.