Quite often, in the open ground, and in the greenhouse, and in the container for seedlings, vegetable growers prefer to plant not dry, but already germinated tomato seeds.
For the process to be successful, you need to know in advance and present all its stages, namely how to plant sprouted tomato seeds.
In this article, we will tell you about all the main intricacies of germinating tomato seeds and their subsequent planting in the soil, and give tips on how to prevent mistakes.
Sprouting tomato seed
First of all, you need to select the appropriate seed.. Regardless of whether the seeds were purchased in a store, purchased “by hand” or prepared for storage independently, some batches will be the most viable, while others may be a high percentage of weakened and even so-called “empty” ones. In order to check this, they are tested for germination, taken alive and calibrated (evaluated by size and appearance).
Then the seeds are treated: disinfected, hardened and fortified, and then proceed directly to germination. For this you can use cloth, gauze or, for example, cotton pads. Some growers use paper napkins.
Reference. Seeds of factory production, having a turquoise, blue or green color, have already passed all the necessary training, and they do not need additional processing.
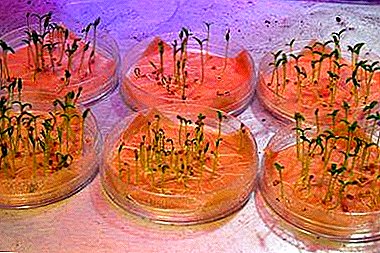
The damp lining under the seeds is placed in a plastic container or covered with polyethylene and left in a well-warmed room for several days, usually 3-4. The appearance of small shoots means the readiness of the seeds for planting.
Why is this done?
 The germination of seeds is not a mandatory measure, but many vegetable growers resort to it, because it is of great importance:
- non-germinated seeds of tomatoes are rejected in advance;
- the procedure significantly contributes to the growth of growth: the difference with unsprouted seeds can be from 2-3 days to 7 or more;
- seeds eventually become much more hardened and viable;
- seedlings appear evenly, and care for seedlings at one stage of growth is easier.
The percentage of germination when planting germinated seeds is much higher. Perhaps the only disadvantage of this method is that it requires special care and accuracy.
Pre landing
When the soil and seeds are prepared, the seeds are planted in a greenhouse or in containers for seedlings. The earth is stirred and then leveled - for this, as a rule, a thin wooden plank or, for example, a ruler is used.
After planting, containers with future seedlings are covered with a light-transmitting non-woven film, for example, polyethylene.
First way
- A wooden plank is pressed on the soil, going 5-10 mm deep down: by doing so, lines are made, breaking up the area into beds.
- Seeds are planted in a row at a distance of 1 cm, between the beds it is enough to make 2.5-3 cm.
- After that, they are sprayed and sprinkled with soil in a layer of 8 mm for stunted and 1.5 cm for tall varieties.
Second way
- The soil surface is divided into squares of 4 × 4 cm.
- In the center of each is made a recess of 1.5 cm, in which 3 grains are put, after which the layer is leveled and moistened with the help of a hand sprayer.
During the daytime, it is necessary to maintain the temperature of + 20-24 ° С, at night - +18 ° С. The ideal temperature for tomatoes is +25 ° C.
Landing in the soil
Before planting, it is necessary to prepare soil mixture or to break through the soil, disinfect and, if necessary, add fertilizing, make sure that the ambient temperature is suitable for the plant to grow and not fall asleep, check the consistency and condition of the soil.
The soil
 The soil mixture is bought or made independently by calculating equal parts of turf, peat land and humus. If the land is prepared for seedlings, it is recommended to include in the composition of sawdust.
To the soil turned out not too heavy for the shoots, it adds sand, recruited on the banks of the river, in the proportion of 1/5 share of the total.
You can not take the land, which is located near irrigation fields and reservoirs: it can be toxic. The layer thickness of the mixture for planting seeds is 4-5 cm.
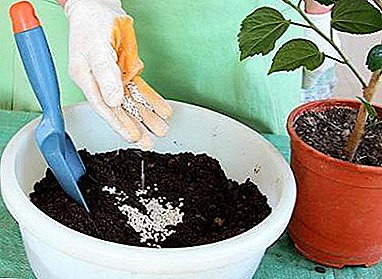
When the seedlings are planned to dive, a top dressing is added to the soil, which should contain phosphorus, magnesium, boron, potassium, molybdenum, manganese, copper and nitrogen: 1 tbsp. spoon of mineral fertilizer for 10-12 kg of soil mixture.
Two days before planting, the soil is disinfected.: potassium permanganate (potassium permanganate) is dissolved in hot water and shed.
Optimal time
The timing of planting seeds largely depends on where the grower plans to grow them. Planting in open ground should begin no earlier than mid-March; it is carried out in a greenhouse or container for seedlings from February 18–20 until the 10–15 of the following month. More exact dates should be established, proceeding also from other factors: a grade of tomatoes, climatic features, external conditions of cultivation.
Tip In each case, it is desirable to adhere to the approximate landing time specified by the manufacturer: usually this information is written directly on the bag of seeds or in the enclosed instructions.
Sprouted shoots
When the first two leaves appear from the ground, the plants need to provide enough light. Containers with seedlings are recommended to be placed closer to the window.. If planting was carried out in February, both for them and in the greenhouse should be organized artificial lighting.
In this case, for 5 days, the temperature should be from +14 to +16 ° C during the day and up to 12 ° C at night, after which it should be raised to the previous level. After germination of all plantings, the plants should be fed, alternating organic and mineral fertilizers in a liquid form.
Sowing instructions
 Grown up saplings dive: together with a clod of earth they are transplanted into plastic containers (for example, cups), and then they are placed in pallets with sawdust 2-3 cm layer and filled with a mixture in which the seeds germinated. After picking the plants can be carefully watered.
If the leaves of the seedlings are dark, and the stem is a little purple in color, the plants do not need a sub-feed. Otherwise, fertilizer must be added seven days before transplanting.
Three days before planting in the ground lower leaves are removed. The wells with a depth of 10-15 cm are pre-filled with nutrient soil and shed with an aqueous solution of saturated purple-colored potassium permanganate for additional disinfection.
If the nesting is planned for planting, then in a square of 80x80 cm, 2-3 plants of undersized or 2 plants of tall varieties.
You can also plant seeds in a greenhouse or in open ground for further growth and development of full-fledged plants without subsequent transplanting. In this case, the distance between the holes and the seeds is kept 2-3 cm and 7-10 cm, respectively. In each well the seeds are laid with a margin of 2-3 grains. Seedlings in one nest should be of the same variety.
Possible errors and warnings
- Germinated seeds require very careful treatment: when the spine is damaged, the sprout will not appear. This must be remembered both during germination (to ensure that the roots do not get tangled) and during planting.
- During the landing, it is necessary to maintain the correct distance between the holes and the beds. Planted too closely, plants may not get enough nutrition, oxygen and water and weaken. Or go to the rapid growth in the pursuit of light to the detriment of the fruit.
- It is not necessary to make landing too early. It is necessary to wait for the ground and the air to warm up sufficiently, and freezing does not occur at night. If it is too cold, the plant will "fall asleep." Any growth delays may subsequently affect the quantity and quality of the future crop.
- It is necessary to make sure that the seeds are not in excessive depth, from where the sprouts will have to make their way up to the top for a long time and with difficulty. Watering the soil should be carried out before the landing, so that the seeds do not fall. After that, the humidity can be adjusted by covering the crop or using a sprayer. It is enough not to bury small seeds, but simply to sprinkle with soil.
- If the soil is not decontaminated, it can lead to infection and disease of seeds and plants.
- In heavy ground, sprouts will grow more slowly, and in insufficiently dense, they may begin to grow weaker.
- Before landing and after it is required to follow the condition of the soil. Oxygen enters an excessively wet soil, which is fraught with growth retardation and even death of seeds, and it will be difficult for them to get out to the surface in dry and loose. Also, excess moisture can cause mold. To avoid this, after disembarking, it is necessary to conduct airing once or twice a day, removing cover.
- If the grains are bare after irrigation, the soil should be filled with a layer of 1-1.5 cm. To avoid this, you can not water, but spray.
- If the plants are planted in open ground, at a temperature of +26 ° C and above, the film should be folded back from the sides.
Tomatoes are a fairly simple culture for breeding, which both connoisseurs and beginners enjoy with pleasure.