Orchids in flasks - plants saplings that are sealed in a glass bottle. There are many plants in the tank at once and they can be purchased in Vietnam or Thailand as an inexpensive exotic gift.
But it should be understood that the flowering plant from these seedlings can be obtained only after 4-6 years, depending on the species. But if you are a beginner florist, then you have a great prospect to gain experience in the cultivation of orchids, while not spending a lot of money.
Plant in a flask - what is it?
Often tourists are brought from Asia to the country, especially lately. On the one hand, this is a souvenir, and on the other hand, a great way to save money when buying orchids. At the same time to take the plants in such a state without damage.
First, they pollinate the flowers themselves, then they collect seeds that look like dust. Then placed in a flask, which contains a sterile, nutrient medium.
 A flask with an orchid is placed in a warm bright place and waiting for germination.. As soon as they appear and get stronger, they will open the vial and transplant the seedlings into ordinary pots.
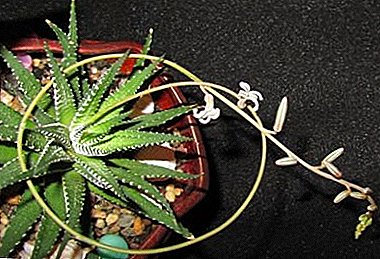
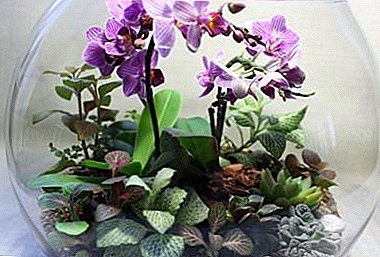
Through the transparent walls of the vessel it is very interesting to observe the growth and development of the plant.
Where and at what price is the orchid already sold in the flask sold? (price region - Moscow, St. Petersburg) If you buy a flask with orchids in the online store, then its cost in Moscow will be about 4,000 rubles. In St. Petersburg, about 2000 rubles. But this is only an approximate price, since The price of chamfer depends on the size of the flask and the type of flower.
Pros and cons of such a purchase
Buying an orchid in a sealed, transparent flask, the florist receives a large number of advantages:
- opportunity to grow an orchid that is germinated from seeds;
- the plant is very resistant to various diseases and infections, with flowering occurs annually;
- low cost;
- is a great gift for lovers of exotic orchids;
- the ability to grow a large number of plants at minimal cost;
- In one flask there can be several types of plants.
But, despite the advantages, this purchase has negative sides:
- it is necessary to understand that buying an orchid in a bottle, flowering will come no earlier than in 5 years;
- in this state, you can buy not all varieties of orchids, so only Vanda, Dendrobium, Phalaenopsis are sold.
Do I need to repot?
Many flower growers, having received a flask with orchid saplings, are wondering if they should be immediately transplanted? In one container brought from Asian countries there are more than a dozen orchids, therefore transplantation is necessary, but you cannot do it right away - the plants must adapt.
Put the flask in a bright and warm place for 2 weeks, and only after this time can you start planting seedlings in separate pots.
Orchids are transferred from a flask in stages:
 "Acclimatization" - relieving stress in plants after a hard move. The flask should be installed on the window sill filled with sunlight, while it should be ensured that there are no drafts and a strong temperature difference. So the flag should last 2 weeks.
It is possible to transplant seedlings without acclimatization only if during transportation the flask turned over and the contents mixed. It is also worth doing if the flake for plants has become too small.
- Transplant in compliance with all security measures.
- Arrange for proper care.
 "Acclimatization" - relieving stress in plants after a hard move. The flask should be installed on the window sill filled with sunlight, while it should be ensured that there are no drafts and a strong temperature difference. So the flag should last 2 weeks.
Step-by-step instructions for moving a flower from a transparent container to a pot
It should immediately make a reservation that orchid does not tolerate frequent rearrangement from place to placetherefore, the acclimatization flask should be placed on the window sill, on which the pots with plants in the substrate will later be located.
Before transplanting young plants, they need to be carefully released from the flasks, so as not to damage the delicate roots and leaves.
If the flask is glass and with a narrow neck, it is impossible to pull out seedlings through it without damaging it.
You need to do the following::
- Wrap the vial with several layers of soft cloth and smash with a hammer. You need to act very carefully so as not to cut yourself.
- Then pick young orchids and rinse with warm, running water from the nutrient mixture.
- In order for the seedlings to adapt to life in the air, they need to be dried, leaving them in the air, at a moderate temperature for some time.
After young plants are removed from the flask, washed and laid out for drying, they should be carefully examined. If the roots are small or are only in the bud, then they will need to grow.
Do build the next way:
 Spray the young orchids with a solution of fungicide and leave for 30 minutes.
- Place small plants in a mini hothouse. To this end, sphagnum moss is steamed and disinfected. Then moistened and spread on the bottom of a large glass container.
- Then put the young seedlings on the moss and cover the container with glass on top. This design will create the atmosphere of the tropics, with high humidity.
- If condensate appears on the walls, it should be immediately wiped and ventilated in a greenhouse daily. If you do not, then young orchids just rot.
- There should not be direct sunlight on the greenhouse - the light should be diffused.Do not forget in a timely manner, spray the moss - it should not dry out.
- As soon as the seedlings grow roots at least 5 cm, you need to start accustoming the plant to life in the air, for this the greenhouse is left open for 2 weeks, starting from 20 minutes and increasing the time gradually by 20-30 minutes every day.
 Spray the young orchids with a solution of fungicide and leave for 30 minutes.
Now the seedlings are ready to be placed in the substrate.
The action algorithm is as follows.:
- Prepare the substrate and the pots - you can take simple plastic cups, in the bottom of which they make several holes to drain excess moisture.
- Put drainage on 1/3 on the bottom of each cup.
- Then cover the drainage with a small amount of substrate.
- Dip the orchid roots in a glass and gently straighten them on the sides.
- Growth point should be at the level of the edge of the cup.
- Substrate dosypayut with extreme caution, so as not to damage the delicate roots.
- To compact the substrate, shake the pots several times.
- Put young orchids on the windowsill in the usual conditions - do not water.
 Plant Care Algorithm:
- Before transplanting young orchids should go through a period of adaptation and extension of the roots, if necessary.
- After transplantation, the plant begins to be watered on the 4th day, preferably with a spray bottle, just to moisten the substrate. Top dressing can be made in a month.
Maintain a comfortable temperature and humidity for the orchid.
Possible problems and difficulties of growing
- It is often impossible to take out young saplings without damaging the leaves or roots.
- If the tops rest against the cap or walls of the flask, the seedlings will have to be transplanted without adaptation.
- Folded leaves suggest that the plants in the flask are overgrown.
- Fungal diseases.
- During transport, the contents are mixed.
Orchid in a flask is a great gift that is often taken from trips to Thailand. Having grown this plant at home, you can significantly change the interior of your apartment.